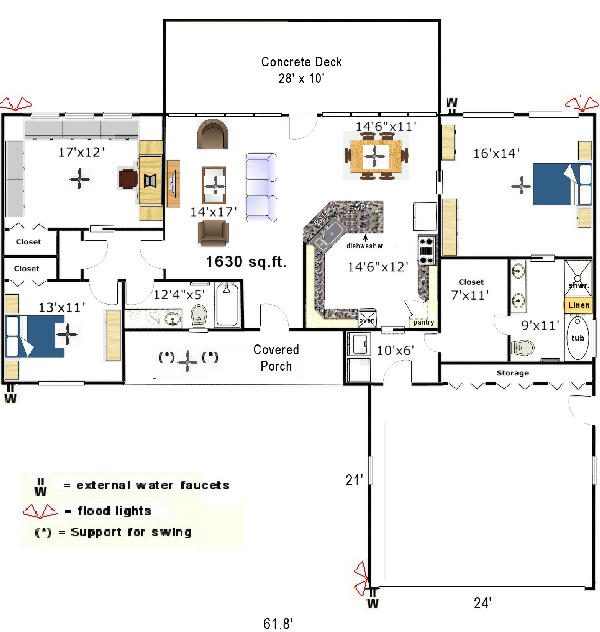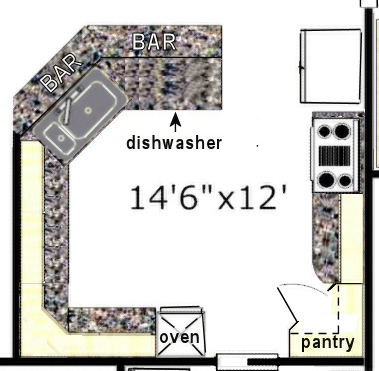
Click picture above to see kitchen in the floor plan.
|
 |
Above is the original plan for Judy's kitchen. The problem with it is that you cannot see how the cabinets will actually look, how many there will be, what width they need to be, etc. So I used a graphics program to draw the cabinets.
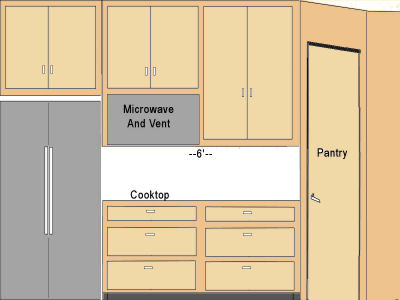
The above right shows the right wall of the kitchen on the floor plan. At first I put the cooktop and microwave/vent to the left next to the refrigerator so that the cabinets to the right of it would be the same width as the cooktop area, 3'.
The ladies said to center the cooktop, which meant splitting up the cabinet on the right into two 1.5' wide cabinets to go on either side of the cooktop and vent. I was lucky to have them to tell me that because my layout would have looked bad. This was one of several design mistakes that I made.
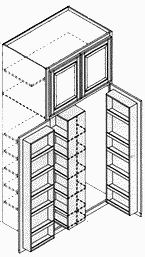
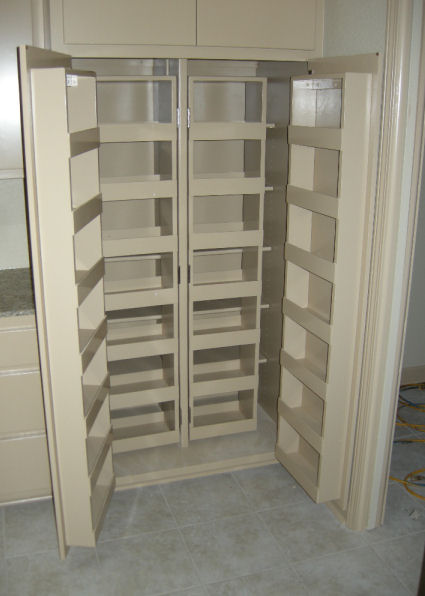
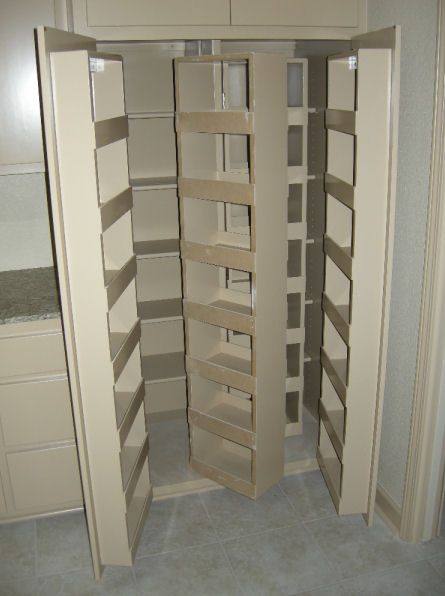
The cabinet builder said that we didn't have enough space to build a walk-in pantry with an angled door the way I had it planned. This was my second big design flaw. This time the cabinet builder saved me by suggesting the kind of pantry seen below. The front set of shelves swings out for access to the back set, and more shelves line the inside of each door:
Here is how the revised plan of the right wall looked:
You can see how nice and balanced this looks -- much, much better than my original plan.
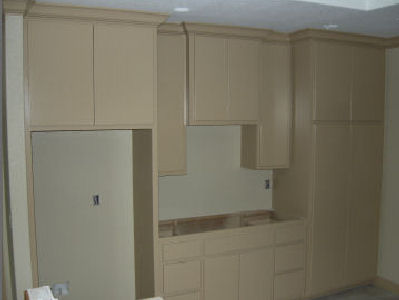
While on the subject -- if you look at my drawing, above, you can see that I did not plan for an enclosure around the refrigerator. This was Buss' idea, and it looks much better than having the refrigerator exposed.
I did draw the cabinet above the refrigerator, but neither in the drawing nor in my floor plan did I indicate how deep the cabinet (much less the enclosure) should be.
It turns out that the cabinet and enclosure is not as deep as it could have been -- not deep enough to cover the sides of the refrigerator. To do that, you have to allow for the depth of the refrigerator plus a couple of inches which it will sit away from the back wall.
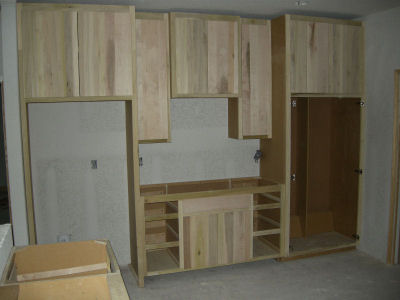
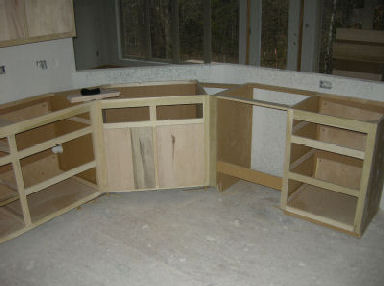
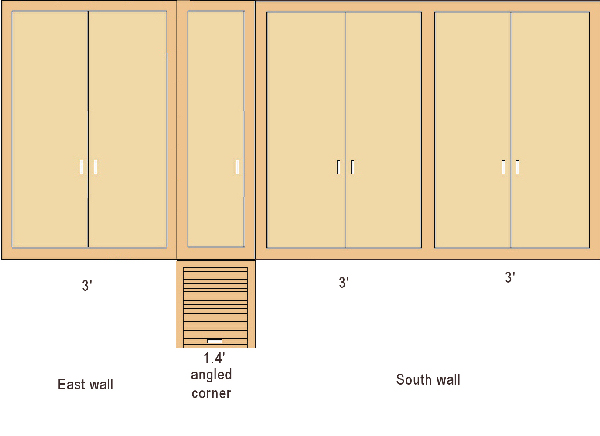
Below are the cabinets wrapping around the other two walls:

In drawing the cabinets along the other two walls, I first had one drawing with the upper cabinets
lined up above the base cabinets. Then I realized that as they went around the corner, they would not
line up because of the upper cabinets being shallower than the base cabinets. So I drew them separately.
Also worth noting in the picture above is that we specified drawers rather than cabinets in the base
whenever possible. This makes things easier to get to. An alternative is to have cabinets with pull-out
shelves, but instead of just pulling out a drawer, you have to open two doors, pull out the drawer
(hoping the corners of the drawer do not scratch the inside of the doors), push in the drawer, and
close the two doors. I have always found this door opening and closing to be a nuisance. Cabinet
doors were still necessary in the corner cabinet, under the sink, and under the cooktop.
The picture above is of the upper cabinets. The thing sticking out at the bottom is an "appliance garage"
which goes from the upper cabinets to the base cabinets and will hide things like toasters, mixers, etc.
It took quite a bit of experimenting to get the dimensions of the upper and base cabinets right so that
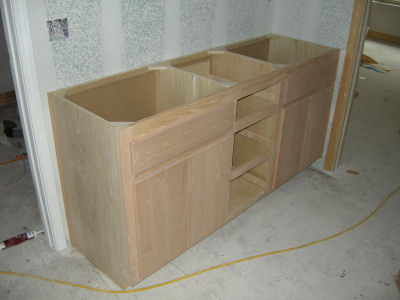
they would line up going around the corner. Eventually, I had to make the 3-D model seen below.
It's not real pretty, but it let me get the dimensions right.
|
In the pictures above, you can see that the cabinets just to the right of the oven cabinet are about half the size as in my drawings and model. One reason is that the oven cabinet was pushed over several inches to make room for the light switches. That could have been avoided by putting the switches on the other side of the wall, just outside the door, but I didn't think of it when we were placing switch boxes.
The other reason is that the cabinet builder widened the corner cabinets and appliance garage to make them more accessible. The resulting narrow base cabinet has a vertical divider in the middle because we decided to use that space for storage of cookie sheets, serving trays, etc. The narrow drawer above it will be good for pot holders, etc.
The two upper cabinets to the right of the appliance garage were my 3rd design flaw. (You probably don't want to hire me to design a kitchen for you.) These cabinets have two sets of doors which open facing each other. I had planned that this would be two cabinets, each with shelves going all the way across behind two doors. This is how our kitchen cabinets are. What I overlooked is that our cabinets are only about 27" wide, but Judy's are 36" wide. Shelves that long would sag, eventually, unless bulky supports were added. So the cabinet builder put a dividing wall between each set of doors and the shelves only had to run 18" for each section.
|
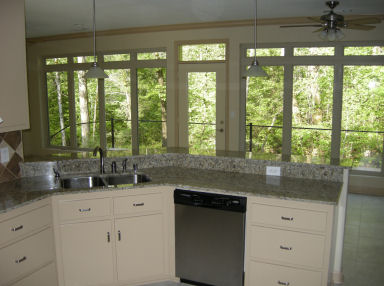
Here are pictures of the sink, dishwasher and surrounding cabinets. From behind the sink, the TV in the living room and the view
of trees, birds, and wild life out the back will be competing for Judy's attention.
Click here for the story of Judy's kitchen backsplash.
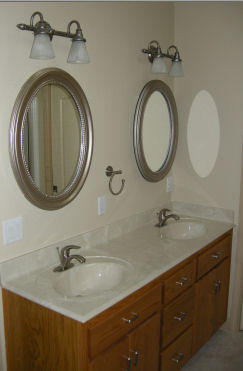
Bathroom Cabinets
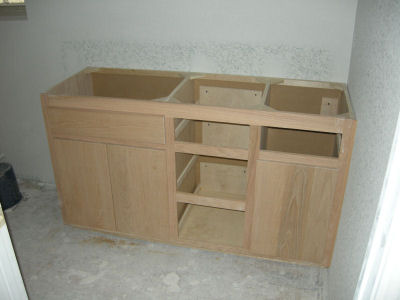
Master bath: Vanity has two sinks with drawers between the
lower cabinets. There is also a linen cabinet between the shower
and the tub and a cabinet above the toilet. Medicine cabinets
are recessed into the wall behind the mirrors.
 |
 |
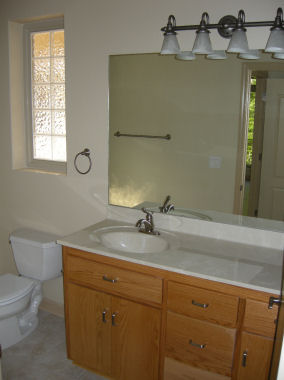
Guest bath:
One sink on the left with drawers and cabinet on the right:
 |
 |
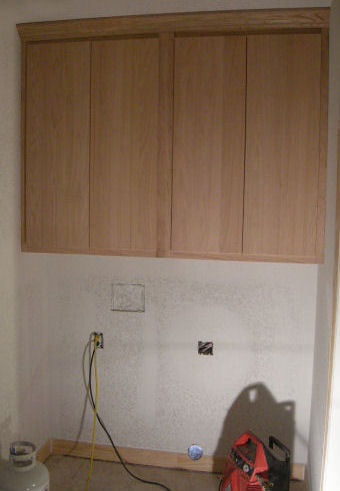
Laundry Room Cabinets
If you plan to have cabinets above your washer and dryer, leave plenty of space in case you currently have
or in the future may get a front-loader washer/dryer with a pedestal base, which can be over 50" tall, depending
largely on the height of the pedestal base.
|
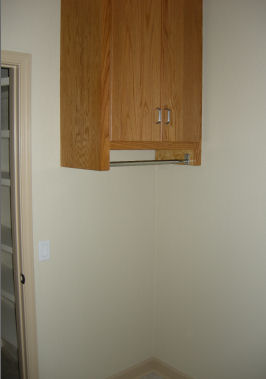
This cabinet on the other side of the laundry
room has a pole under it for hanging wet
clothes to dry.
|
If you know from the start that you are going to have a front loading washer and dryer, you should be aware that normal overhead cabinets will be hard to reach because front-loaders are deep. And they are usually mounted on bases which makes getting to cabinets set back above them even harder. (Not having the bases will involve a lot of bending over, which is not a pleasant option for those of us
of a certain age.)
So with front-loaders on bases, consider having the cabinets built out to the edge of the washer and dryer. This will make them very deep, but at least you can reach them. To really have a customized look, you can get the cabinets built right down to the top of the w/d. This would require the cabinet builder to have the exact dimensions of the w/d with bases and to allow room at the bottom of the cabinet for the lip at the front-top of the w/d.
|

|
Click here for more information about kitchen and laundry room design.
Click for:
|