but you can also see when the picture in the other window is finished loading.
The pages on this site are mostly filled with pictures. If you do not have a cable modem or other high-speed Internet access, the pages might be slow to load.
Left-click on a small picture to see it enlarged.
Right-click on any picture to save it to your hard disk. (Normally you would want to save the enlarged picture, not the thumbnail.)
Picture enlargements are loaded in a new browser window. The new window will probably come up over the window you were already viewing. You can use the mouse to resize the new window to make it smaller, then click on the original window so that you can continue reading it while the picture enlargement is loading. (If you have broadband - DSL or cable -- this may not be necessary since load times are so much faster.)
If you want to try this out,
When you are through viewing an enlargement, instead of clicking on the BACK button to return to a previous page, you must close the current window. Click on the "X" at the upper right corner of the picture's browser window to close it. If you wish, you can leave a picture's window open for reference.
In fact, you can leave several browser windows open, disconnect from your ISP (without closing the browser), and view/read the windows off-line if you wish.
You can watch your browser's activity indicator to tell when the picture is fully loaded, or close the window while it is still loading if you have seen enough.
Both the hike pages and the Building A House pages have some "Virtual Reality" pictures. VR pictures let you zoom in an out (by clicking on the + and - buttons) and move around in a complete circle (by clicking and holding the mouse button in the middle of the picture and dragging the pointer left or right), viewing everything around the photographer when the picture was taken.
To view VR pictures, you need QuickTime 3.0 or later installed on your system. To see if you already have it installed, click here. If QuickTime does not come up, then you need to download and install it.
You can download QuickTime for free by clicking here to go to Apple's page. Select your system (Mac or Windows) and click the download button.
"Movie" pictures, such as a hiker crossing a creek, are played by a small JAVA applet. If you have JAVA turned off, you will not be able to see the animation.
Movies are very short, but the files are large, averaging 400k-500k. They may take a few minutes to download. You can move the window aside and while it is loading, you can continue to browse the Web. Newer movie files (starting in 2002) are much large, from 1 to 3+ MB. We do not recommend selecting these unless you have high-speed Internet access.
Most of the hiking and kayaking pictures in recent times are stored in 1024x768 size. This has two advantages. The first is that most people set their displays to this size, so it gives those people a full-screen, high-resolution picture. The other is that it lets you print the picture with higher resolution.
If you do not have your display set to 1024x768, you can easily do
so:
Even if your display is set to 1024x768, you cannot see a whole picture at once because of the space used by your browser window's menus, etc. To minimize that problem, starting in February 2002, the Hike and Kayak pages offer two ways to select an enlargement.
Your first choice should be to click on a thumbnail picture. This will cause the page to use Javascript to bring up a browser window without the menus, buttons, etc., and you can see almost the full picture.
If you try this and it doesn't work, you probably do not have Java turned on. So your other option is to click on the highlighted caption below the picture. This will display the enlargement in a regular browser window.
Because pictures "pop up" in a new window, if you have a pop-up blocker, it may keep the picture from appearing. You can either tell your blocker to allow this web site to do pop up's (we never display ads) or hold down the Shift key when you click on a picture.
Starting with version 6.0, Internet Explorer automatically resizes large pictures to fit within your browser windows (assuming that feature is turned on, which it is by default).
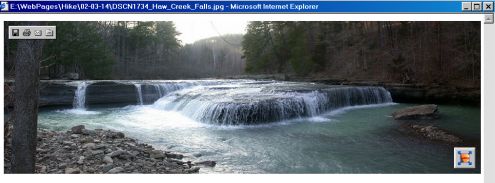
IE-6 also puts some control buttons at the upper-left and lower-right
corners of pictures, as shown below. To make these buttons appear,
simply bring the cursor to rest anywhere on the picture. The lower-right
button resizes the picture to its original size.

Usually, you lose little by viewing the sized down version of a 1024x768 picture in a full-screen browser, but for a panaromic picture which is much wider than the screen width, I recommend viewing the picture full-sized and using the browser's left-right scroll bar to view the whole picture. To try this out, click on the picture above or click here for a regular browser window.
While we used to create QuickTime files for viewing panaromas, we found that you get about the same effect by scrolling the picture in a browser window.
You can save any picture or graphic to your hard disk which you see in your browser. Simply put the cursor over the picture and click the right mouse button. A menu will pop up; one menu option will be to save the file to disk.
If you want to save a picture to disk, be sure to get the enlarged picture. You normally do NOT want to save the little thumbnail sized picture.
Any color inkjet printer can print photos. You can get one with 1400 dpi resolution (or higher) for under $200.
There are lots of different types of papers to print photos on.
Making t-shirts or sweatshirts with your own photos (or our hike photos) is a lot of fun.
Supposedly, you can put the transfers on a t-shirt or sweatshirt with an iron, but I could not get a good result this way. A t-shirt shop charged me $3 per shirt to put my transfers on my shirts, but they came out looking great.
New transfer materials have come out which let you pull the transfer backing off the shirt AFTER it has cooled, which should make it easier to get good results.
I got a photo-ink cartridge for the Espon, which is supposed to create better looking photos, but be aware that you should NOT use that cartridge for t-shirt transfers.
If you have an inkjet printer, be sure that when you start to print, you go into printer set-up/options and set the paper type to "t-shirt transfer". This is necessary to get the picture printed in reverse so that it comes out right when applied to a t-shirt. If your printer driver does not have this option, you cannot make a transfer.
You can download any pictures from this site and use them for making t-shirts, greeting cards, etc. Most inkjet printers come with software for doing this.