Judy's Backsplash
Judy found a tile she liked at Sutherlands and brought home a large card that had a sample of the tile she wanted. Before making a final decision, she compared the sample to the granite she was getting, and finally told the builder, Jim Buss, what she wanted.
| I went to visit the house one day and the backsplash behind the cooktop had the tile installed but not grouted.
The dark part of the tile looked red to me and there was more dark (red) than light (tan). (This picture doesn't do justice to how bad it looked.) It did not go with the granite at all. I took a tile home, thinking that there had to be a mix-up, but when I got home and looked at the tile again, it looked brown rather than red, and it matched the tile on the sample card exactly. As I've said elsewhere, you cannot tell how carpet, tile, wallpaper, or paint will look on a wall or floor from a small sample. |
 |
|
Your best bet is to get the tiler to call you when the tile is at the house and before it is installed. You can spread it out and see how it is going to look with the existing paint or stain, etc., before the tile is permanently installed. Since we caught this problem when only a small section of tile had been installed, the builder allowed Judy to buy a new tile and he paid to have the old tile ripped out and the new tile installed. When we ordered the second tile, it was with the intention of having alternating light and dark tiles, but a mixup on the order gave us a weekend to consider other designs before having to order the tile. |
Above: First tile. Below: Second tile.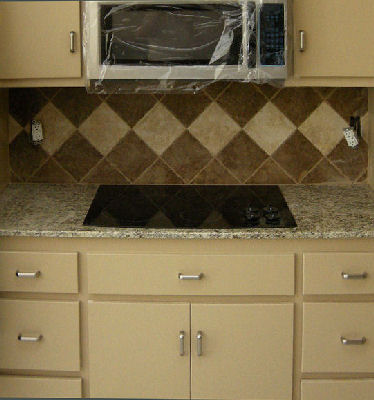
|
By coincidence, I saw an alternating light-dark pattern on a TV show, but this was after Judy and I both had already decided (from the mock-up on the left) that we did not care for this look. This picture did not change our minds, although it might be a great look for a more country or French style house.

|

|
Even before the first tiles were installed, we had talked about having a diamond pattern where
the darker tiles would be picked out and used to create a row across the backsplash like this:

So we already had this idea in mind when we began rethinking patterns for the new light and dark tiles. We changed the idea to make the dark tile predominant with a row of light tiles going across. This would provide more contrast to the light colored cabinets. We also decided to put the contrasting light row of tiles in the middle rather than on top.
But when we went to order, we found out that we would have to order a box of 50 tiles to get the 17 light ones that we needed, and two boxes of 50 dark tiles (100 total dark) to get the 53 (or so) dark ones needed. So I set to trying to create a design similar to what Judy liked that would use more light tiles and fewer dark ones.
|
I really liked this pattern, but it actually only used a couple of more light tiles, so that wouldn't help. 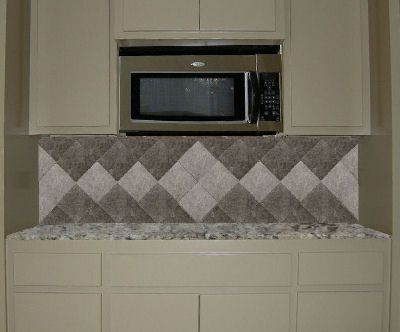 |
This idea was to use a dark row on a light background above the cooktop and a light row on a dark background on the other wall.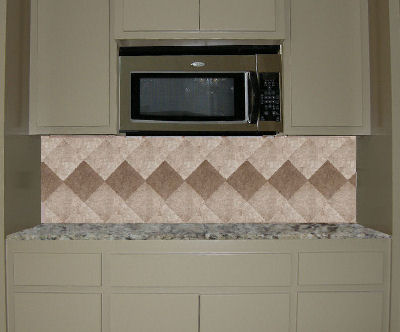
|
Judy preferred the single row to the fancy pattern on the left, above, and didn't want the light-dark on one wall and dark-light on the other, which was probably a wise decision. So she opted to buy another box of the dark tile, which despite being so wasteful, only cost her another $65 or so.
Here are a couple of more ideas we considered:
Top row light: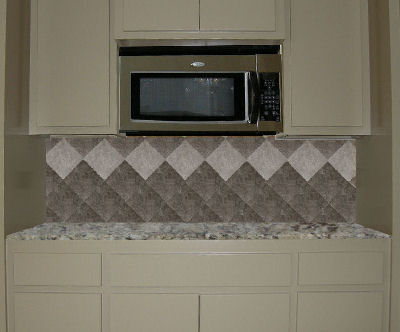 |
Solid dark: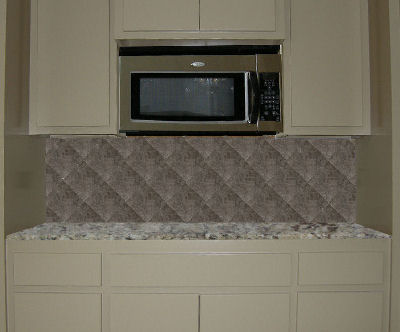 |
Judy also considered using granite tiles in a diagonal pattern for the backsplash, but could not find a close enough match to her granite countertop.
Other Backsplash Considerations
When Judy was trying to select a replacement tile for the backsplash, she considered a "tumbled" tile. Our concern was that this tile is not glazed and, being a porus tile, would absorb grease being over the cooktop and other foods and liquids in the other work areas, so we passed on that.The tile she selected is glazed, but the grout between the tiles is porus and needs to be sealed with a good, penetrating sealer. A good sealer should last at least 15 years, but we were told that the sealer will fail if exposed to chemicals in some cleaners, so be careful how you clean the tiles (just water, if possible).
In your contract with the builder, you should specify that all grout in the house is to be sealed, but if you forget, then ask him about getting the kitchen grout sealed, even if you have to pay for it. We didn't specify it, but Buss had it sealed as part of his usual thorough approach to building a house.
Trying To Choose From A Sample
The picture below is of the sample card being held up against the granite. The colors appear to match fairly well.
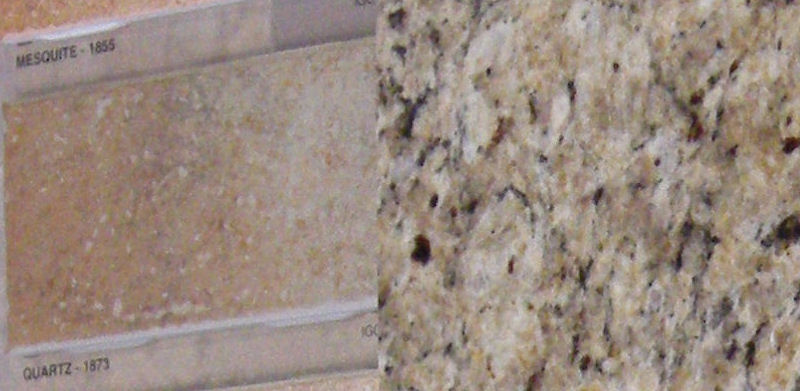
|
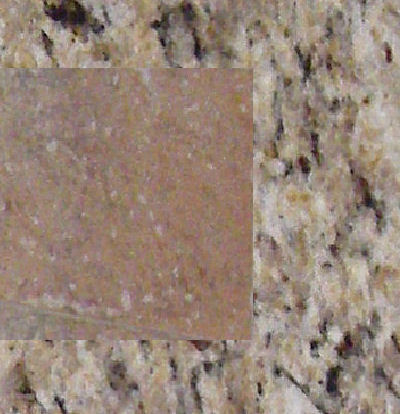
When we discovered that the colors did NOT match, I cut and pasted the sample tile onto the granite to make it easier to compare the darker end of the sample to the granite:
In this picture, it is easier to see that the redish brown color in the sample does NOT match any of the colors in the granite. (The extent to how obvious this is depends on the color balance, brightness, and contrast of your monitor. You may have to just take my word for it.) |
 |
Computer-Generated Backsplashes
In case you are wondering, I created the patterns on this page in a graphics program, Paint Shop Pro ("PSP"), which is similar to Photoshop. I started by taking digital pictures of the tiles and the areas where they were to go.
I measured the height of the backsplash area (18") and the size of the tiles diagonally (about 9"). I resized the tiles in PSP so that two tiles placed diagonally tip-to-tip would just fit the 18" space vertically.
Then I "installed" the tiles by copying and pasting them into place. Some times I was able to copy whole rows of tiles to save time. For the "dark row on light background" picture, I just clicked a button to create a negative image of the light on dark picture (and then massaged it a little).
This is a great way to see how patterns will look, but it is hard to capture the exact colors of things, so it is not that great at seeing how various colors will go together.
If you do not have a photo manipulation program, you can always just use a pencil and paper to draw the tiles and tape that onto a photograph you've had printed of the backsplash area.
To see some pictures of different REAL backsplashes, click here.